Policies - New UI
SECURITY Refer to ACCOUNT > Policies and SITES > Policies in Security Level Details - Permissions.
SECURITY For ComStore policies, also refer to COMSTORE > ComStore in Security Level Details - Permissions.
NAVIGATION New UI > Policies > All
NAVIGATION New UI > Policies > click any policy type in the list
About policies
A Datto RMM policy is a framework by which you define the technical model behind a Standard Operating Procedure (SOP). A policy allows you to do the following:
- Define something you want to do, for example, configure a setting or run a monitor.
- Define which devices you want to target by using filters and groups.
- Deploy any changes immediately or wait for the changes to be automatically deployed later.
You can create and manage the following policy types in the New UI:
Further policy types are available in the current UI. Refer to Types of policies.
Creating a policy
Navigate to the Policies page by following any of the navigation paths described above. Click Create Policy and specify the policy details.
Enter a name for the policy.
Enter a description for the policy.
Choose one of the following options:
-
Global: The policy will apply to all sites in the Datto RMM account.
-
Site: The policy will only apply to one site. Once this option is selected, enter a site name. The search results will be narrowed as you type.
From the drop-down list, select a policy type and configure its details.
An Agent policy deploys settings to affect the operation and configuration of the Datto RMM Agent. An Agent policy may affect Privacy Mode, Agent installation and service, security, and the Agent Browser mode. For information about the Agent, refer to Datto RMM Agent.
Privacy mode options
Select any of the following options:
| Option | Description |
|---|---|
| Activate Privacy Mode on devices | Automatically turns on Privacy Mode for all devices targeted by the policy and will require end user permission when connecting to a targeted device. Once Privacy Mode is enabled on a device, the Datto RMM Administrator cannot disable this setting. Privacy Mode can only be disabled by the end user on the device itself. For further information, refer to Privacy Mode. |
| Allow connections to the device when no user is logged in | Allows you to connect to a device when no user is logged in but Privacy Mode is enabled on the device. NOTE This setting will apply to all remote connections. |
| Only require permission from the device when connecting with Restricted Tools | Allows you to configure Privacy Mode in a way that end user permission is only required when the following tools are used: VNC, RDP, Splashtop, Screenshot, or Web Remote. |
Service options
Select any of the following options:
| Option | Description |
|---|---|
| Install the Agent as Service-only, preventing the application displaying in the System Tray or Start menu for Windows devices | No system tray icon or Start menu shortcuts will be installed. It is only available for Windows devices. Hiding the Datto RMM Agent icon in the system tray may be useful if you do not want your end users to access all of the options it offers (for example, the option to create a ticket), or because you want to prevent end users from stopping the Agent or turning on Privacy Mode. When this option is selected, the gui.exe process (Agent Browser) will not start on the targeted devices, and the following features will be unavailable: • Remote takeover toaster notifications. If the targeted device is using Privacy Mode, the end user will be unable to authorize remote takeover requests. • Patch reboot toaster notifications • Prompts to authorize the execution of jobs • Chat • Screenshot IMPORTANT Selecting this option will not close the gui.exe process if it is already running. The targeted device needs to be restarted in order for the gui.exe process to not start on boot. |
| Prevent the Agent from running Jobs | Prevents the Agent from running jobs. NOTE Even if this option is selected, components enabled as User Tasks can still be installed. Refer to User Tasks. |
| Prevent remote access from another device | Prevents remote access to the targeted device from another device. |
| Prevent the Agent from submitting audits to the platform | Prevents the Agent from submitting audits to the platform. |
User actions
Select any of the following options:
| Option | Description |
|---|---|
| Remove user access to the Privacy Mode options | Removes access to Privacy Mode Options from the system tray icon. NOTE You cannot disable Privacy Mode in the Agent using this setting if Privacy Mode has already been activated. Once Privacy Mode is enabled on a device, it can only be disabled by the end user. For further information, refer to Privacy Mode. |
| Remove user access to the Settings menu | Disables the following features: • Access to the Settings menu from the system tray. Refer to Settings. • The ability to edit the device description from the system tray. Refer to Device description. |
| Remove user access to the Quit option | Removes the option for the user to exit the Agent. |
| Prevent users from creating tickets from the Agent Browser tickets tab | Removes the option for the user to log a ticket through the Agent. |
| Allow users to select ‘Request support’ from the menu | This option is only available if the Autotask PSA Integration is enabled. Refer to Autotask PSA Integration. When this option is selected, the Request support menu entry is added to the Agent. |
| Allow users to select ‘Take screenshot and request support’ from the menu | This option is only available if the Autotask PSA Integration is enabled. Refer to Autotask PSA Integration. When this option is selected, the Take screenshot and request support menu entry is added to the Agent. |
Agent Browser mode
Select one of the following options from the drop-down list:
| Option | Description |
|---|---|
| Disabled | Prevents any access to the Agent Browser window. |
| User - no access to support tab | Allows the user to open the Agent Browser window but prevents them from logging in. For more information, refer to Log into the Agent Browser. |
| Admin - can log into support tab | Allows full access to the Agent Browser window. This option is selected by default. Refer to Agent Browser. |
An ESXi policy allows you to apply one or more monitors to multiple ESXi devices to monitor their performance, datastore, temperature, and hardware status.
-
In the Monitors section, click Add Monitor.
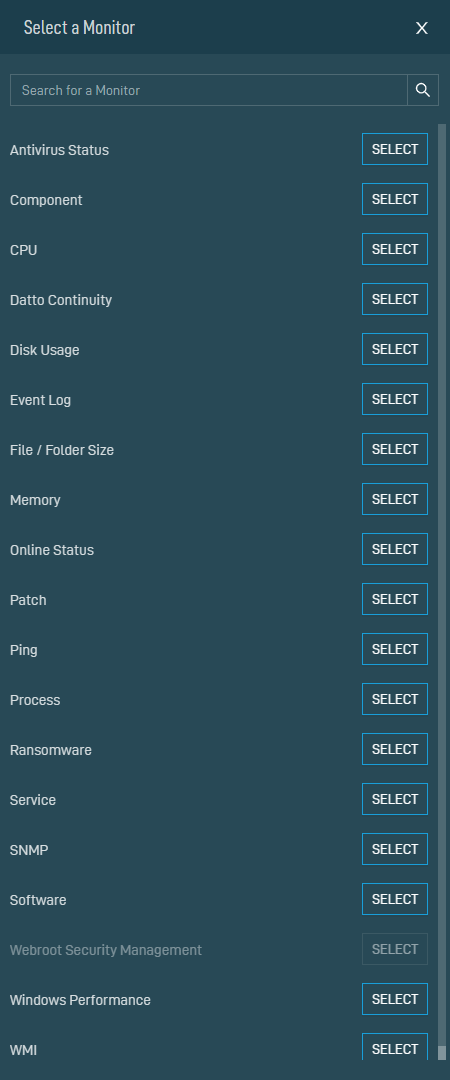
- In the Monitor Type section, click Select.
- In the Select a Monitor pane, use the search bar to search for a monitor type or scroll down in the list. Click Select to specify the monitor type.

- Once the monitor type has been selected, you can configure the monitor criteria. To choose a different monitor type, click Change Monitor Type and modify your selection.
-
Configure the monitor criteria. For information on all available monitor types, refer to Alert details per monitor type and Response details.
-
Once you have configured the monitor details, click Add Monitor.
-
To add further monitors to the policy, repeat the steps above. To review the details of a monitor, click its description. Refer to Viewing monitor details. To delete a monitor, click the Delete icon.


A Maintenance policy allows you to pause monitoring while doing scheduled maintenance work on your devices.
- During the maintenance window, monitors will be disabled for the targeted devices. This allows you to prevent false alerts, for example, during a backup.
- Disabled monitors will not create tickets or send email notifications; however, response components will be executed as normal.
- If the alert condition is still in effect when the maintenance window ends, a new alert will be generated.
When configuring the policy, the calendar view in the Schedule > Recurrence section provides a visual indicator of when the maintenance window will occur according to the selected schedule.
| Field | Option | Description |
|---|---|---|
| Recurrence |
At selected date and time |
The policy will run once on the date and at the time specified in the Start date and execution time section. |
|
Daily |
The policy will run every day starting from the date and time specified in the Start date and execution time section. | |
|
Weekly |
The policy will run every week starting from the date and time specified in the Start date and execution time section. In the This Policy will run on these days section, select the days on which the policy should run. Clicking a second time will clear the selected day. | |
|
Monthly |
The policy will run in the selected months starting from the date and time specified in the Start date and execution time section. In the This Policy will run in these months section, select the months in which the policy should run. Clicking a second time will clear the selected month. In the On these days section, enter the days of the month (1-31) on which the policy should run, separating each day by a comma (for example: 1, 2, 3-7), and click Add. Once added, the days are listed below this field and can be removed by clicking the X next to the day you wish to remove. | |
|
Monthly day of week |
The policy will run in the selected months on the specified occurrence of the selected days of the week starting from the date and time specified in the Start date and execution time section. Clicking a second time will clear the selected option. | |
| Duration |
Hour/minutes |
Specify the duration of the maintenance window (0-24 hours, 0-59 minutes). |
Once a device has been placed into maintenance mode, an icon is displayed next to the device name at the top of the Device Summary page. For more information, refer to Maintenance mode status indicator.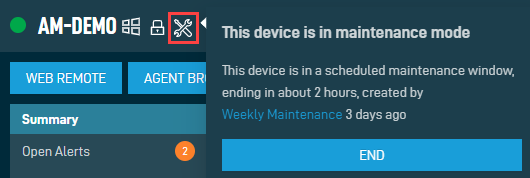
NOTE You can create a maintenance mode widget to see all devices currently in maintenance. Refer to Devices Under Maintenance.
A few things to note
-
Changes made to a Maintenance policy while it is running or within 15 minutes of the start of a maintenance window will only take effect at the next run. For example, if you are creating a new Maintenance policy with a daily schedule, and the start date and execution time is set to 10 minutes from now, the first run time will only occur on the following day.
-
You can end a scheduled maintenance mode window by updating the associated Maintenance policy so that it no longer targets the device. Refer to Editing a policy.
-
You can also end a maintenance mode window on the Device Summary page or on a device list page. Refer to Ending a maintenance mode window.
A Monitoring policy allows you to apply one or more monitors to multiple devices.
-
In the Monitors section, click Add Monitor.
- In the Monitor Type section, click Select.
- In the Select a Monitor pane, use the search bar to search for a monitor type or scroll down in the list. Click Select to specify the monitor type.
- Once the monitor type has been selected, you can configure the monitor criteria. To choose a different monitor type, click Change Monitor Type and modify your selection.
-
Configure the monitor criteria. For information on all available monitor types, refer to Alert details per monitor type and Response details.
-
Once you have configured the monitor details, click Add Monitor.
-
To add further monitors to the policy, repeat the steps above. To review the details of a monitor, click its description. Refer to Viewing monitor details. To delete a monitor, click the Delete icon.
NOTE Datto also offers best practice Monitoring policies. For more information, refer to Download a ComStore policy.
A Software Management policy allows you to configure third-party software application updates and define when those updates should be installed.
Once a policy is configured, you can create a Software Management Status widget in the New UI to have an overview of the software compliance status of your devices. Refer to Software Management Status.
In the current UI, you can also use the Software Management dashboards at the account and site levels, and the Software Status page at the device level. Refer to Software Management at the account and site levels and Software Management at the device level.
IMPORTANT Only one Software Management policy can be enabled per device.
NOTE The third-party software applications you want to manage through a Software Management policy do not have to be downloaded from the ComStore. A Software Management policy can be configured independently of what's already present in your Component Library.
For general information about Software Management in Datto RMM, including the supported applications and operating systems, security level permissions, Software Management status, software compliance reporting, and more, refer to Software Management.
All new accounts are provisioned with a default Software Management policy that can be found in New UI > Policies > Software Management > Default Software Management Policy and is configured the following way:
| Field | Description |
|---|---|
| Name | Default Software Management Policy |
| Scope | Global |
| Type | Software Management |
| Timing | Immediately On Detection |
| Managed Applications | All Actions are set to Unmanaged. |
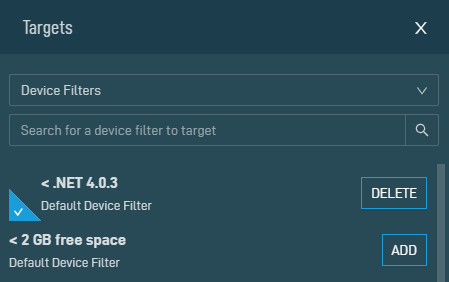
| Targets | • Default Device Filter - All Desktop O/S • Default Device Filter - All Server O/S |
| Enabled | Enabled |
| Disable Sites | All sites are enabled. |
| Disable Devices | All devices are enabled. |
You can create another Software Management policy or modify the default one by following the steps below.
Timing
Select one of the following options:
-
Immediately On Detection: An application update will be installed as soon as the Agent detects that an update is ready.
-
Schedule: The Agent only checks for and installs software updates on a scheduled basis. The calendar view in the Schedule > Recurrence section provides a visual indicator of when software updates will occur according to the selected schedule.
| Field | Option | Description |
|---|---|---|
| Recurrence |
Daily |
The policy will run every day starting from the date and time specified in the Start date and execution time section. |
|
Weekly |
The policy will run every week starting from the date and time specified in the Start date and execution time section. In the This Policy will run on these days section, select the days on which the policy should run. Clicking a second time will clear the selected day. | |
| Duration |
Hour |
Specify the duration of the policy (0-24 hours). |
Managed Applications
Specify the policy Actions for each application.
NOTE For a list of supported applications, refer to Supported software applications and operating systems.
A note on audit
Although software compliance status changes are instantly displayed on Software Management pages, it may take up to 24 hours for the changes to be reflected on audit pages. Refer to View audit data at the account or site level and View audit data at the device level.
For a policy to be applied to a device, the device needs to be part of a filter or a group that the policy targets. To learn how to add a device to a filter or a group, refer to Filters and Groups in the current UI. To learn how policy memberships get recalculated, refer to Policy membership recalculation.
To manage the policy targets, follow these steps:
-
Click Add Target to open the Targets pane.
-
From the drop-down list, select one of the following target types: Device Filters, Device Groups, or Site Groups. You can use the search bar under the drop-down list to search for a filter or a group, or you can simply scroll down in the list.

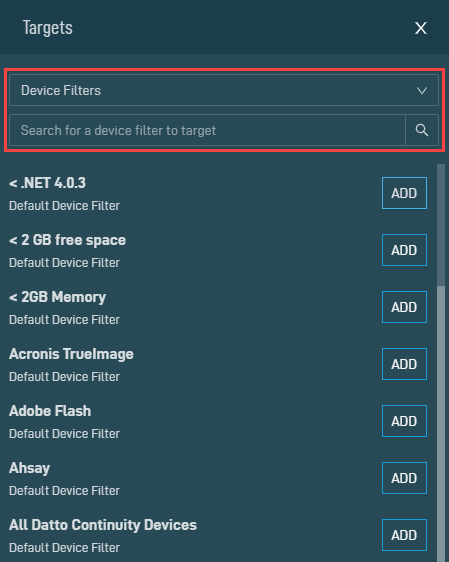
NOTE The Device Filters option contains all Default Device Filters and Custom Device Filters.
NOTE The Site Groups option is only available for global policies.
-
Click Add to add a target or Delete to remove it.
You can also remove a target on the policy page by clicking the Delete icon.
NOTE Devices of Unknown device type will not be targeted by the policy.
NOTE Multiple targets will apply the OR logic, that is, the policy will be run on a device if it is included in any of the targets.
The Enabled section allows you to enable or disable a policy by clicking the Enabled or Disabled button, respectively.
Depending on the scope of the policy, you can also disable or enable sites and exclude or include devices, which is explained in the table below. When a device is excluded from a policy, the policy will not run on that device. When a site is excluded from a policy, the policy will not run on any of the devices in that site.
NOTE Some options may not be available upon policy creation as explained in the table below.
| Scope | Enabled/Disabled | Option | Description |
|---|---|---|---|
| Global | Enabled | Disable Sites | Click the Disable Sites button to open the Sites pane. You can use the search bar to search for a site, or you can simply scroll down in the list. Click Disable to exclude a site or click Enable to include a site. By default, all sites are included.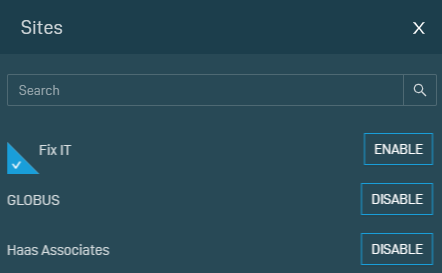 Disabled sites are listed on the policy page, and a badge displays the number of these sites. You can remove a site from the list by clicking the Delete icon. This action will include the site in the policy again.  |
| Global | Enabled | Disable Devices | This option is only available once the policy has been deployed and the targets have been calculated; however, the Disable Devices button will remain grayed out if the list of targeted devices is empty. Click the button to see a list of disabled devices. The number of these devices is displayed on the button, for example, Disable Devices (1). Click the device name to open the Device Summary - New UI page, and click the site name to open the Site Summary - New UI page. To remove a device from this list, click the Delete icon. This action will include the device in the policy again. Click Edit to open the Targeted Devices pane. You can use the search bar to search for a device, or you can simply scroll down in the list. Click Exclude to exclude a device or click Include to include a device. By default, all targets of the policy are included. 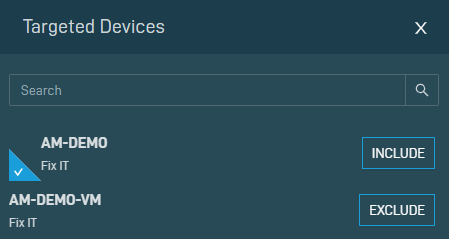 NOTE Make sure to save the policy for these changes to take effect. Refer to Saving and deploying the policy. |
| Global | Disabled | Enable Sites | Click this button to open the Sites pane. You can use the search bar to search for a site, or you can simply scroll down in the list. Click Enable to include a site or click Disable to exclude a site. By default, all sites are excluded.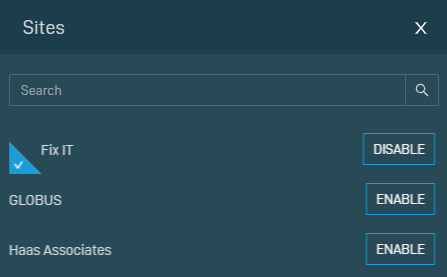 Enabled sites are listed on the policy page, and a badge displays the number of these sites. You can remove a site from the list by clicking the Delete icon. This action will exclude the site from the policy again.  |
| Global | Disabled | Disable Devices | Refer to Disable Devices. |
| Site | Enabled | Disable Devices | Refer to Disable Devices. |
| Site | Disabled | Disable Devices | Refer to Disable Devices. |
To discard the changes made in the policy, click Cancel.
To save the changes, choose one of the following options:
-
Save and Deploy Now: The changes will be saved and the policy will be deployed immediately.
-
Save and Deploy Later: The changes will be saved and the policy will automatically be deployed later when the policy is recalculated. To learn how policy memberships get recalculated, refer to Policy membership recalculation.
Viewing and managing policies
Navigate to the Policies page by following any of the navigation paths described above. Click All in the left-hand navigation menu to see all policies. To see only one type of policy, select a policy type from the same list. The type Monitoring includes both ESXi policies and Monitoring policies. To see a list of policies of only one site, enter a site name in the Filter by Site field above the Policies table. The search results will be narrowed as you type.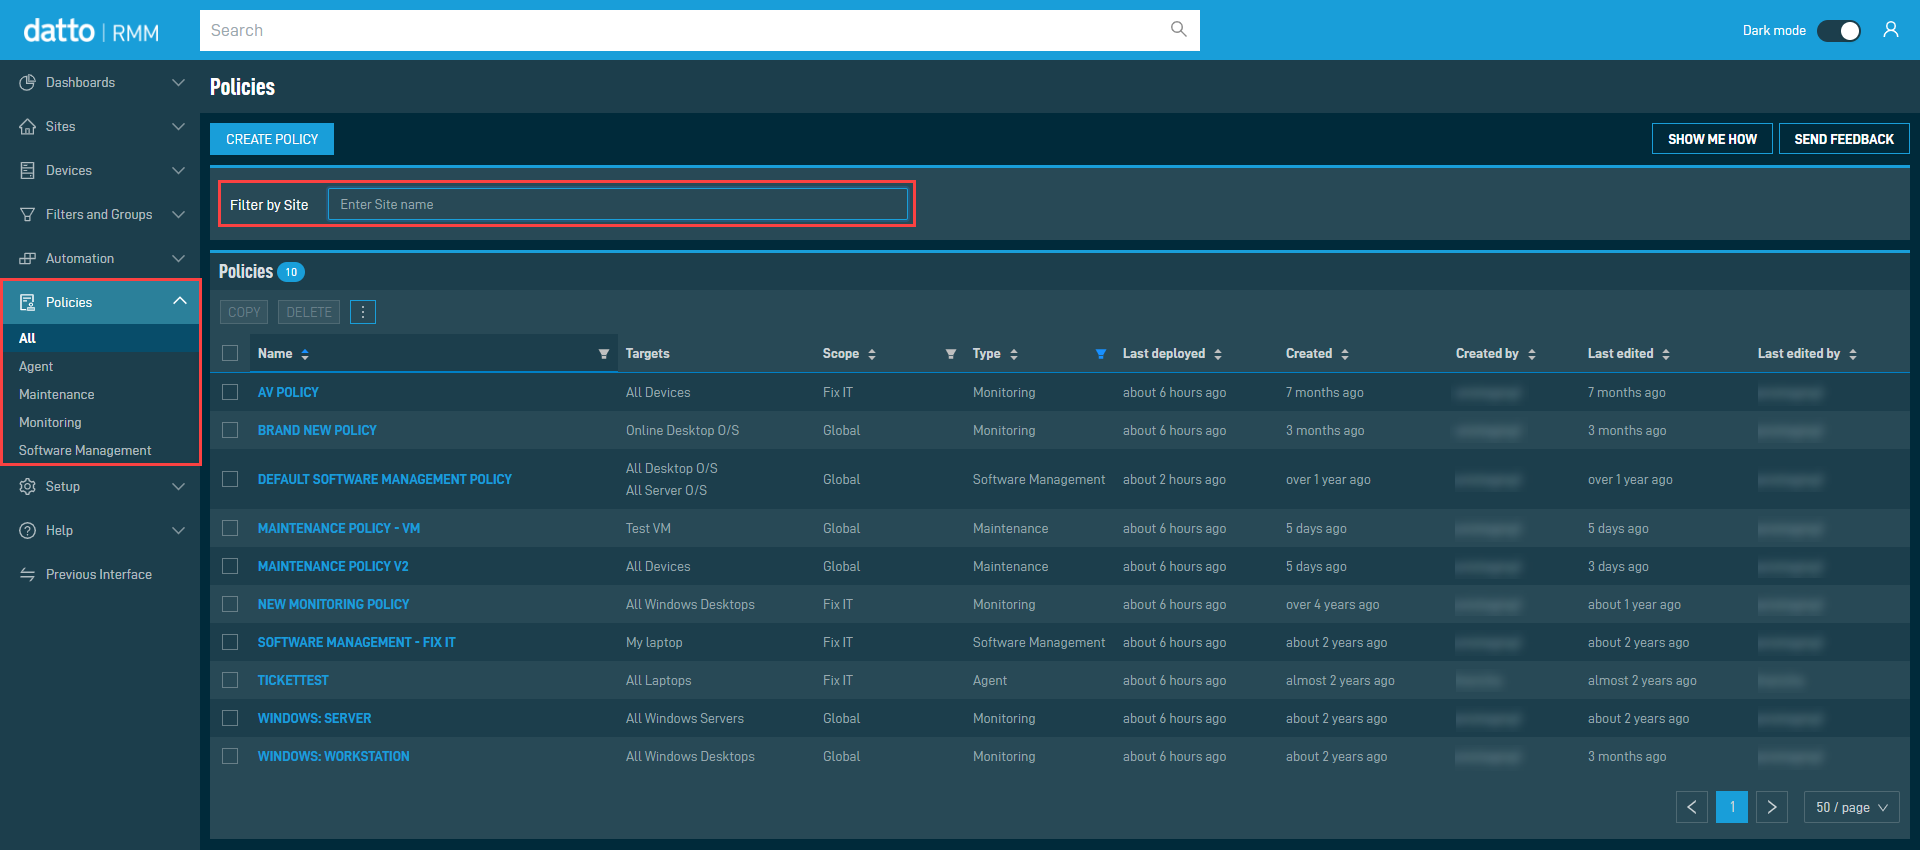
The table displays the following information:
| Field | Sortable? | Description |
|---|---|---|
| Name |
|
The name of the policy. To narrow the list, click the Filter Menu icon, enter a term, and click Search. To see the full list, click Reset. Click the policy name to edit the policy. Refer to Editing a policy. |
| Targets |
|
A list of targets the policy will run against. Refer to Targets. |
| Scope |
|
This field indicates whether the policy affects all sites or only one site in the Datto RMM account. Refer to Scope. To narrow the list, click the Filter Menu icon and click All, Global, or Site to filter by the scope of the policy. |
| Type |
|
Displays the type of the policy. Refer to Type. To narrow the list, click the Filter Menu icon and select the policy types you want to see. |
| Last deployed |
|
Displays when the policy last ran. |
| Created |
|
Displays when the policy was created. |
| Created by |
|
Displays the username of the user who created the policy. |
| Last edited |
|
Displays when the policy was last edited. |
| Last edited by |
|
Displays the username of the user who last edited the policy. |

The number of results displayed can be specified by selecting the desired number from the drop-down menu at the bottom of the table. This selection will persist the next time the page is accessed.
Action buttons
The action buttons are grayed out if no row is selected or if the action is not applicable to the selected rows. The selection box allows you to select one or more rows. Select all rows shown by checking the selection box in the table header. To access all action buttons, click the Row Actions icon at the end of the row. The table below lists all available action buttons.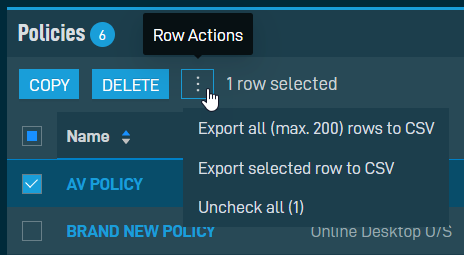
| Action Button | Description |
|---|---|
| Copy | Allows you to copy an already existing policy. You can then modify the policy details of the copy as necessary. This action is only available when a single row is selected. This action is also available when editing a policy. Refer to Editing a policy. |
| Delete | Deletes the selected policy upon confirmation. This action is only available when a single row is selected. This action is also available when editing a policy. Refer to Editing a policy. |
| Export All (Max. 200) Rows to CSV | In the confirmation dialog box, select whether to show table headers in the file by toggling the Show table headers in the exported CSV button. Select OK to download the file. A maximum number of 200 rows can be exported to a single CSV file. The Export All (Max. 200) Rows to CSV action is available without selecting any row in the table.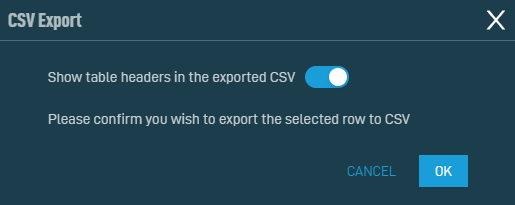 |
| Export Selected Rows to CSV | |
| Uncheck All | Deselects all selected rows. The number of selected rows is indicated in parentheses and next to the Row Actions icon. |
Navigate to the Policies page by following any of the navigation paths described above. In the Policies table, click the name of a policy to open it. You will see the following information at the top of the page: policy name, Scope, Type, Created by, Last edited by, Last deployed.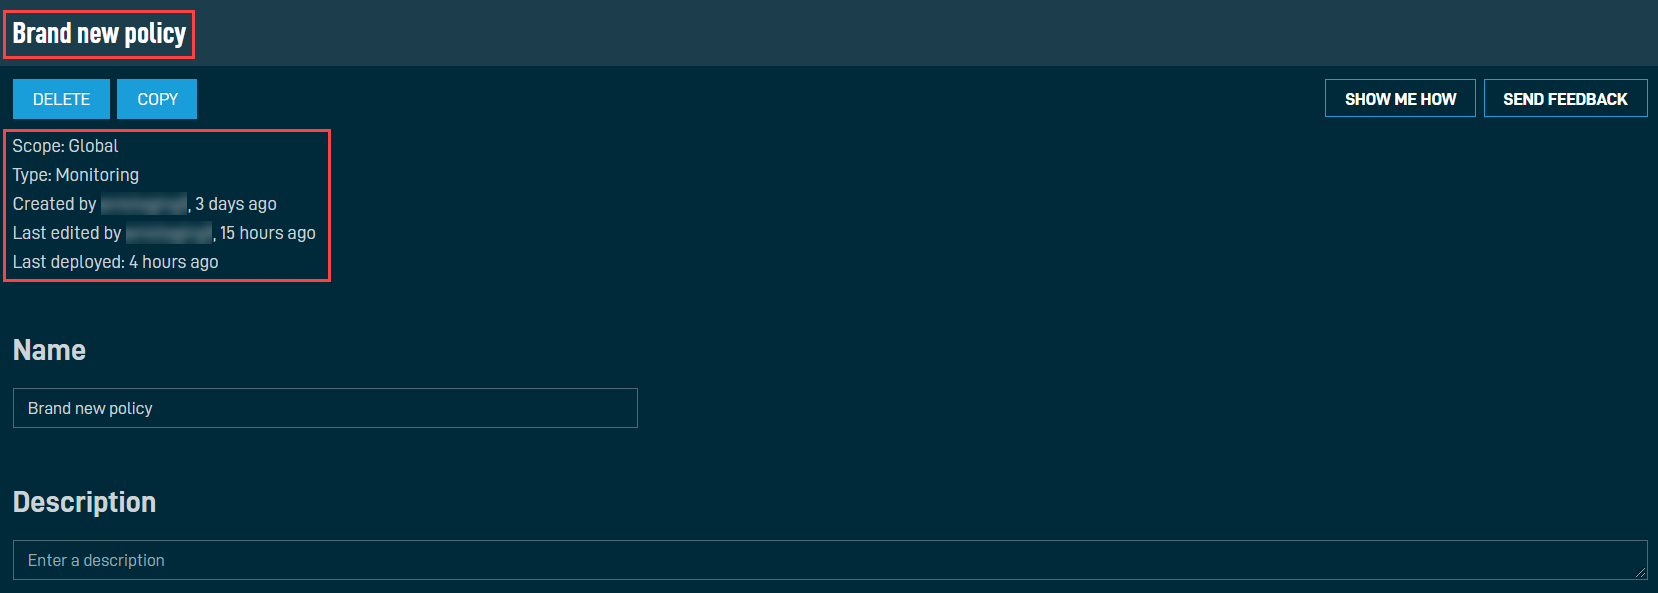
You can edit the policy in the following ways:
-
To update the policy details, refer to Creating a policy.
NOTE The Scope and Type of the policy are not editable.
NOTE When editing a Maintenance policy, please also refer to A few things to note.
-
To delete the policy, click the Delete button at the top of the page. The policy will be deleted upon confirmation.
-
To copy the policy, click the Copy button and modify the policy details of the copy as necessary.
NOTE The Delete and Copy actions are also available on the Policies page. Refer to Action buttons.
To learn how policy memberships get recalculated, refer to Policy membership recalculation.
Best Practices (ComStore policies)
In addition to setting up your own policies, a selection of Monitoring policies is freely available to download from the ComStore. These include best practices to monitor the most common platforms and applications such as Exchange and SQL.
These Monitoring policies aim to provide a best-practice solution for the most typically encountered usage scenarios involving Datto RMM. However, they only serve as guidelines and may require modification depending on device configuration. (For example, ensure that network Monitoring policies are querying the correct SNMP OIDs of your devices).
We encourage you to try these policies on your own devices to provide a solid, baseline monitoring solution to which your own monitoring can be added. Although downloaded from the ComStore, once added to your account, a ComStore policy becomes a regular Monitoring policy which can be configured and changed as required. Targets typically must be configured before use.
For more information, refer to Best practices for Monitoring policies that includes detailed information on the criteria monitored in some of the policies.
To download a Monitoring policy from the ComStore, follow these steps:
- Navigate to the Policies page by following any of the navigation paths described above.
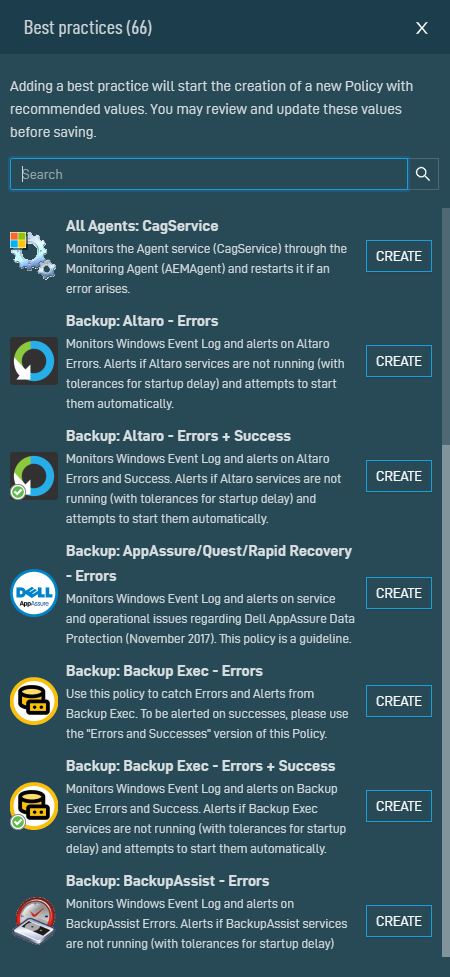
- Click Best Practices.
- In the Best practices pane, use the search bar to search for a policy or scroll down in the list. Search results will be narrowed as you type.
- Click Create to start the creation of a new global Monitoring policy with recommended values.

- On the Create Policy page, review and update the recommended values as necessary. Refer to Creating a policy.
Once you have saved the policy, it will be available in the List of policies.
NOTE The same list of best practice Monitoring policies can also be downloaded in the current UI. Refer to Download a Monitoring policy.


