Datto Continuity Integration
SECURITY Refer to SETUP > Integrations in Security Level Details - Permissions
NAVIGATION New UI > Setup > Integrations > Datto Continuity
About the integration
The Datto Continuity Integration allows you to join Datto Continuity products with Datto RMM, offering many benefits to make protecting clients against downtime and ransomware attacks more integrated and efficient.
IMPORTANT This integration does not apply to Datto Cloud Continuity devices.
Highlights include the following:
- Complete visibility of protected servers and their backup statuses in Datto RMM. View backup information alongside other key device information such as patch status and monitoring alerts. Devices display backup status, offsite sync status, and screenshot verification information. Quickly see if there are any unprotected volumes on a device.
- Seamless technician workflows, which makes it efficient to configure, back up, and restore servers within Datto RMM. Resolve client issues faster by recovering data or by initiating a cloud restore directly from the Device Summary page. Refer to Datto Continuity. Create a backup of a server before making a big change, which provides an extra level of protection.
- The ability to view and configure Datto Continuity devices from a single portal. No need to log in to multiple user interfaces to see all devices in your client’s network; Datto Continuity devices can be managed the same way as any other device in Datto RMM as both systems use Datto single sign-on (SSO).
- The ability to deploy Datto Backup Windows agents with the Datto RMM deployment component. All prerequisite checks are automatically executed, and the agent can be deployed at a scheduled time for several devices at once.
- Complete understanding of device relationships by way of automated links between devices. Instantly see if a server is protected by a Datto Continuity device and whether it is connected to a Datto Access Point, Switch, or Managed Power device.
- The ability to run reports that contain information about Datto Continuity devices. Refer to Reports.
- The capability to integrate with a PSA. Datto Continuity devices will automatically be synced to a PSA system, making it easier to keep a fully updated Configuration Management Database (CMBD) and to automate the billing process.
NOTE The Datto Continuity Integration is free of charge, and Datto Continuity devices do not count toward your Managed device limit.
Video
Requirements
- An active Datto RMM subscription
- At least one Datto Continuity device
- Access to the Datto Partner Portal to obtain API keys
- The legacy Datto BCDR Integration is disabled. For more information, refer to Datto BCDR Integration.
NOTE The Datto Continuity Integration is only available in the New UI.
Supported Datto Continuity devices
All ALTO, SIRIS, and vSIRIS devices are supported.
How to...
- In the Datto Partner Portal, navigate to Admin > Integrations > BCDR.
- In the REST API section, click Reveal to show the REST API Secret Key.
- Make note of the REST API Public Key and REST API Secret Key.
NOTE Ensure that you are using the API keys from within the BCDR section of the Datto Partner Portal.
- Navigate to Setup > Integrations > Datto Continuity.
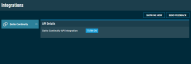
- In the API Details card, click Turn On.
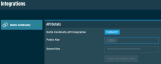
- In the Public Key and Secret Key fields, enter the REST API credentials. Refer to Obtain REST API keys from the Datto Partner Portal.

NOTE Both keys are required in order to complete the integration setup. If the Datto Networking Integration is active, you are not required to enter the API credentials again. Refer to Datto Networking Integration.
NOTE If you turn on the integration and enter a different set of API keys, any existing Datto Continuity devices will be deleted, and Datto Continuity devices associated with the new account will become available. Device synchronization will happen within ten minutes.
- Click Save and Check Now.
- Observe that a message will be displayed if the API credentials are invalid. Ensure that the API keys are entered correctly. A confirmation message will be displayed if the connection is successful.

Once the integration is enabled, you can view a list of Datto Continuity devices associated with your account. 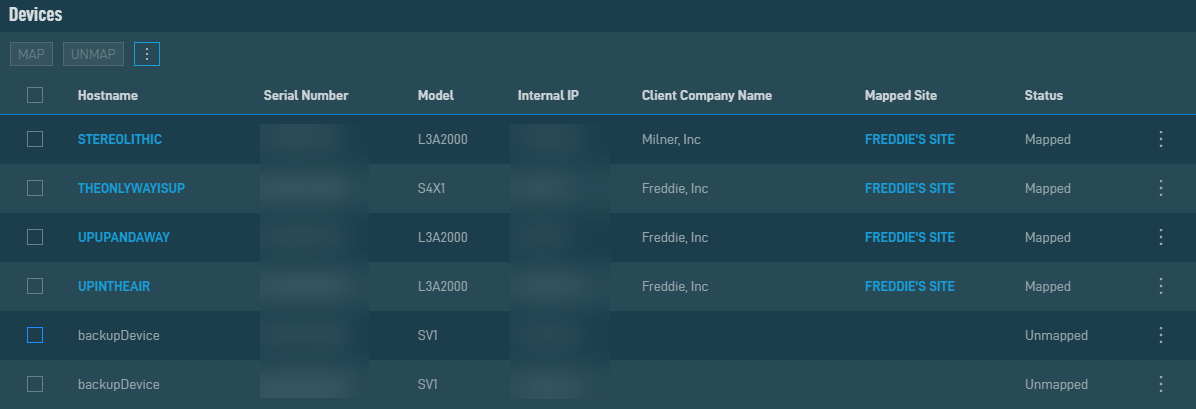
The number of results displayed can be specified by selecting the desired number from the drop-down menu at the bottom of the table. This selection will persist the next time the page is accessed.
NOTE This drop-down menu only appears for lists of greater than ten devices.
Various table actions are available.
The action buttons are grayed out if no row is selected or if the action is not applicable to the selected rows. The selection box allows you to select one or more rows. Select all rows shown by checking the selection box in the table header. To access all action buttons, click the Row Actions icon at the end of the row. The table below lists all available action buttons.
| Action Button | Description |
|---|---|
| Map | Map the selected Datto Continuity device to a Datto RMM site. This will create the Datto Continuity device as a device within Datto RMM. Multiple Datto Continuity devices can be mapped to a single site. When new devices are added in the Datto Partner Portal, they will automatically become available to map to sites within Datto RMM. Datto Continuity devices that are mapped to a Datto RMM site will be kept in sync automatically; if any of the following attributes are updated in the Datto Partner Portal, the changes will be reflected in Datto RMM: • Hostname • IP address • Online/offline status • Protected device is added to the Datto Continuity device • Protected device is removed from the Datto Continuity device |
| Unmap | Unmap the selected Datto Continuity device from the Datto RMM site. |
| Uncheck All | Deselects all selected rows. The number of selected rows is indicated in parentheses and next to the Row Actions icon. |
To map a device to a Datto RMM site, perform the following steps:
- Select the device you wish to map and click Map.
- Enter the site you wish to map the device to. The search results are narrowed as you type.
- Click Map.
- Observe that a confirmation message will be displayed if the mapping action was successful, and that the device's status is now Mapped.
To unmap a device from a Datto RMM site, perform the following steps:
- Select the device you with to unmap and click Unmap.
- Click Unmap.
- Observe that a confirmation message will be displayed if the unmapping action was successful, and that the device's status is now Unmapped.
Datto Networking or Datto Continuity devices cannot be moved between Datto RMM sites or deleted from within Datto RMM. If any Datto Networking or Datto Continuity devices are selected to be moved to another site, these devices will be excluded from the move, and a message will be displayed prompting you to update the mapping. Refer to Map RMM sites to Datto Networking networks or Map Datto Continuity devices to Datto RMM sites. If any Datto Networking or Datto Continuity devices are selected to be deleted, you will be notified in a dialog box that these devices cannot be deleted. The selected Datto RMM devices will then be either moved to the new site or deleted.
If a site is deleted from Datto RMM, any associated Datto Continuity devices will be unmapped from that site. If an account is deleted from Datto RMM, all associated sites and devices will be deleted.
Monitors allow you to keep track of a variety of attributes for devices and can raise alerts when devices are not operating within specified parameters. For information on how to create monitors, refer to Manage monitors in the current UI and Monitors - New UI in the New UI. Alerts generated by monitors will appear in the current UI as well as the New UI in alerts tables and widgets.
Protected devices can be monitored in the same manner as any Managed, Agent-based Datto RMM device. All monitors that function on Windows, macOS, and Linux devices will function on protected devices. Refer to Monitors and policies. In addition, the Datto Continuity monitor is available with the Datto Continuity Integration, which allows you to monitor the endpoints protected by your Datto Continuity devices. Refer to Datto Continuity Monitor in the current UI and Datto Continuity monitor in the New UI.
Datto Continuity devices can be monitored using the Online Status Monitor. Refer to Online Status Monitor in the current UI and Online Status monitor in the New UI.
To target Datto Continuity devices in policies, select All Datto Continuity Devices in the Default Device Filter drop-down list when creating a policy. Refer to Managing policies in the current UI and Policies - New UI in the New UI. Also refer to Filters in the current UI and Device Filters - New UI in the New UI.
NOTE Creating a policy must be done in the current UI.
You can disable the integration temporarily by clicking Turn Off within the API Details card. All of the integration and authentication settings will be retained until the next time the integration is enabled.


