Create a Windows Update policy
SECURITY Permission to manage Policies at account and/or site level
NAVIGATION Account > Policies
NAVIGATION Sites > select a site > Policies
What is a Windows Update policy?
The Datto RMM Windows Update policy is designed to allow Datto RMM to control the Windows Update settings found in the Control Panel of Windows devices. Setting up a Windows Update policy allows you to control these settings on multiple devices in multiple sites, instead of just one.
Windows Update policies can be created at the account or site level. Refer to Create a policy.
Windows Update policies and Patch Management policies
With Windows Update enabled, you allow Microsoft to control the installation of patches.
However, if you are using a patch management policy to install only the patches you have selected, you do not want the automatic settings of Windows Update installing patches you have not approved. Therefore, you must first disable Automatic Windows Updates. Refer to Disable automatic Windows Updates.
How to...
Windows Update policies can be created at the account or site level. Refer to Create a policy.
- On the Policy page, click New account policy... or New site policy...
- Give the policy a Name.
- Select the type Windows Update.
-
To copy an already existing policy to use it as a template, choose it from the Based on drop-down list. To create a new policy, select New Policy.
- Click Next.
-
Click Add a target... to target your devices through a specific filter or group.

If you want to target more than one filter or group, add another target to the policy. Multiple targets will apply the "OR" logic, that is, the policy will be run on a device if it is included in any of the targets. For more information about target types, refer to Filters and Groups.NOTE Filters will present you with a list of the device filters that are available in every account and any custom filters you've created yourself. Devices of Unknown device type will not be targeted by the policy.

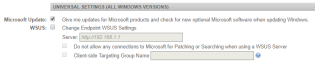
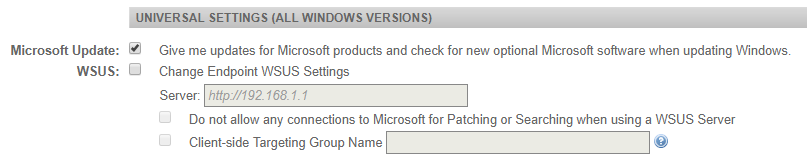
- Configure the Universal Settings (all Windows versions) section. The screenshot below shows the default settings.
| Field | Description |
|---|---|
| Microsoft Update | You can select the following option: • Give me updates for Microsoft products and check for new optional Microsoft software when updating Windows. - Selected by default. NOTE When this setting is selected and applied in the policy, the change will not be visible in the Windows UI; however the status can be queried by running |
| WSUS | If you have set up a Windows Server Update Services (WSUS) server, it will act as a location for other Windows devices to pull updates from, rather than each device having to download Windows updates separately. It acts like a local cache, but only for Windows patches. The following options are available: • Change Endpoint WSUS Settings - Once selected, the rest of the options will become available. Enter the Server address, e.g. http://192.168.1.1 • Do not allow any connections to Microsoft for Patching or Searching when using a WSUS Server. • Client-side Targeting Group Name - It specifies the target group name(s) that should be used to receive updates from an intranet Microsoft update service. If the setting is disabled, no target group information will be sent to the intranet Microsoft Update service. If the setting is enabled, you can enter a target group name or names separated by semicolons (if the intranet Microsoft update service supports multiple target groups). The specified target group information is then sent to the intranet Microsoft update service which uses it to determine which updates should be deployed to the device. |
- Configure the Windows as a Service Settings. The screenshot below shows the default settings.
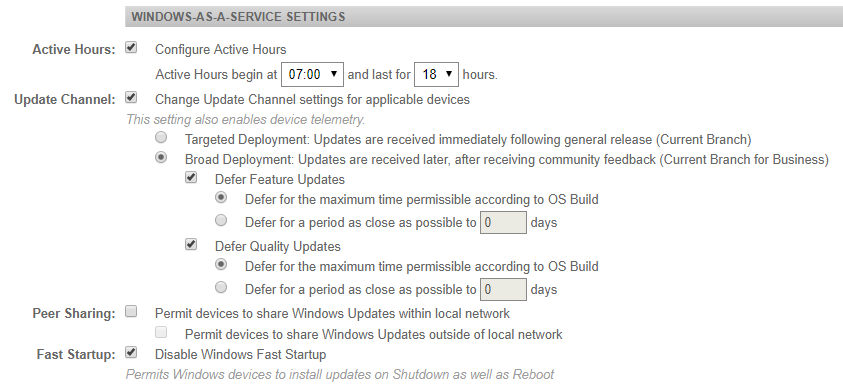
NOTE These settings apply to devices adopting the Windows as a Service model (e.g. Windows 10).
- Configure the Legacy Settings. The screenshot below shows the default settings.
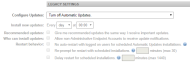
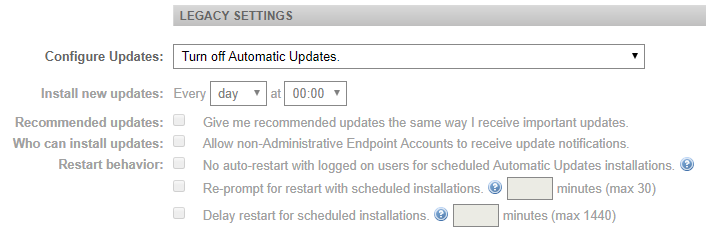
NOTE Based on changes from Microsoft, this setting now works on devices running Windows 10 version 2004 and newer.
| Field | Description |
|---|---|
| Configure Updates | Select one of the following options: • Automatically detect recommended updates for my computer and install them. • Download updates for me, but let me choose when to install them. • Notify me of updates, but do not automatically install them. • Turn off Automatic Updates. - Selected by default. When selected, the rest of the configuration options will be disabled and unselected. For more information, refer to Disable automatic Windows Updates. |
| Install new updates | Allows you to select on which day and at what time you want to install the updates. |
| Recommended updates | You can select this option: • Give me recommended updates the same way I receive important updates. |
| Who can install updates | You can select this option: • Allow non-Administrative Endpoint Accounts to receive update notifications. |
| Restart behavior | You can select any of the following options: • No auto-restart with logged on users for scheduled Automatic Updates installations. - If this setting is not selected, Automatic Updates will notify the user that the computer will automatically restart in 5 minutes to complete the installations. If checked, Automatic Updates will wait for the computer to be restarted by any user who is logged on, instead of causing the computer to restart automatically. • Re-prompt for restart with scheduled installations. (Maximum 30 minutes) - If this setting is not selected, the default delay of 10 minutes will be used. If the setting is enabled, the restart will occur the specified number of minutes after the previous prompt for restart was postponed. • Delay restart for scheduled installations. (Maximum 1440 minutes) - If this setting is not selected, the default delay of 15 minutes will be used. If the setting is enabled, the restart will occur the specified number of minutes after the installation is complete. |
-
Click Save and Push Changes.
If you click Save Only, you'll be directed to your list of policies where you can click Push changes... next to the policy in question.
NOTE If you click Save Only (current UI) or Save and Deploy Later (New UI) instead of Save and Push Changes (current UI) or Save and Deploy Now (New UI) when creating or updating a policy, the changes will still be deployed at midnight in your timezone because policies are automatically deployed every 24 hours.
If you are using a Datto RMM Patch Management policy to install only the patches you have selected, you do not want the automatic settings of Windows Update installing patches you have not approved.
The most elegant way to do that is to create a Windows Update policy to disable Automatic Windows Update on the devices you want to patch.
IMPORTANT Windows updates cannot be disabled on devices running Windows 10 build 1909 and below; however, you can configure various aspects of the updates (as discussed in the Windows as a Service Settings section in Specify the policy details for a Windows Update policy above). For more information about Windows 10 and Datto RMM Patch Management, refer to Patch Management and Windows 10.
The steps below discuss how to disable Windows updates on devices not adopting the Windows as a Service model.
- Create a new Windows Update policy. Refer to the steps specified above.
- Deselect all options in the Universal Settings (All Windows versions) section.
- You can leave or deselect the default selections in the Windows as a Service Settings section as they will not apply.
- Under Legacy Settings > Configure Updates, select Turn off Automatic Updates. This will leave the rest of the options deselected.
-
Click Save and Push Changes.
If you click Save Only, you'll be directed to your list of policies where you can click Push changes... next to the policy in question.
NOTE If you click Save Only (current UI) or Save and Deploy Later (New UI) instead of Save and Push Changes (current UI) or Save and Deploy Now (New UI) when creating or updating a policy, the changes will still be deployed at midnight in your timezone because policies are automatically deployed every 24 hours.
NOTE You can then set up a Patch Management policy to ensure that you install the necessary patches on your devices. Refer to Create a Patch Management policy.


