Creating a component - New UI
SECURITY Refer to COMPONENTS > Components in Security Level Details - Permissions
NAVIGATION New UI > Automation > Components > Create Component
About
In addition to downloading a component from the ComStore, you can create components yourself and share them with other users. A typical component contains a script written in one of several available scripting languages. It may also contain a program to install or an executable to run.
Support covers the following:
- Troubleshoot jobs associated to scripts/components
- Investigate if a script runs successfully outside of Datto RMM but does not run successfully in Datto RMM.
Support does not cover custom script/component creation. Partners are advised to contact their Account Manager for a Professional Services engagement if they require assistance with script/component creation.
Creating a component
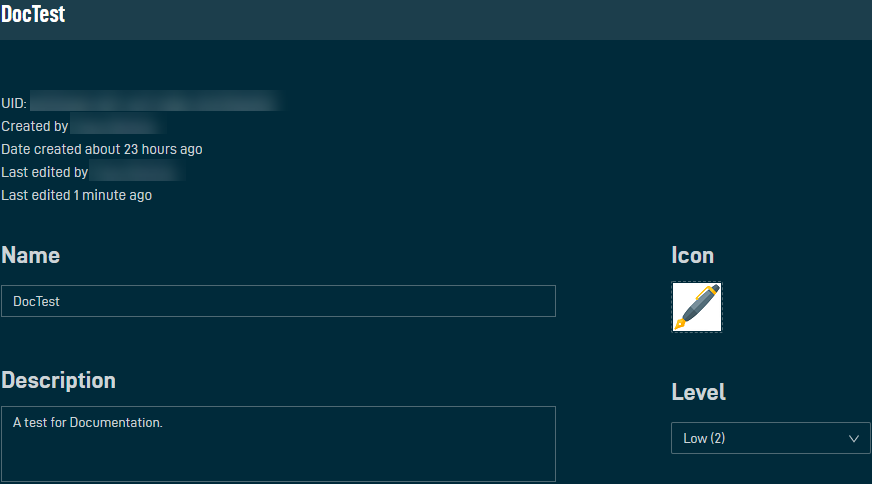
Enter a name for the component.
Click the plus icon to choose an icon to represent the component (48 pixels wide by 48 pixels high, PNG/JPG/GIF file format). Icons larger than this will be resized. If no icon is added, a default icon will be displayed.
Enter a description for the component.
Select the component level from the drop-down list. Refer to Component Level.
Select Applications (default), Monitors, or Scripts for the component category.
NOTE If Monitor is selected, this cannot be changed later.
Configure the following settings: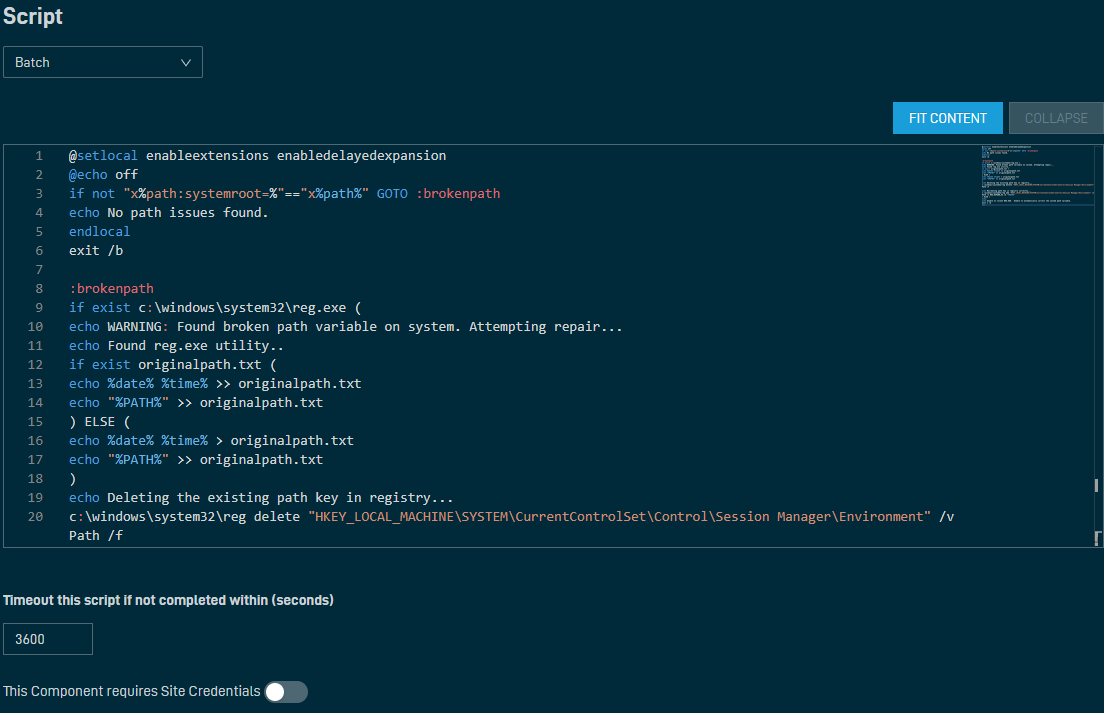
- Select Batch, PowerShell, Shell (Unix, macOS), or VBScript for the type of script this component will run. In the text field below, enter the script. You can enter the script contents line by line, or you can copy and paste an entire script into the field. For more information about scripting, refer to Scripting and Scripting Ninite using Datto RMM. Select Fit Content to view the entire script on the page or Collapse to fit the script into a smaller, scrollable window to save space.
- Timeout this script if not completed within (seconds): Allows you to set the maximum amount of time, in seconds, after which the script will time out.
- This Component requires Site Credentials: Only available for the categories Applications and Scripts. If installing this component requires a username and password that is unique for each site, toggling this setting to ON will allow Datto RMM to use the cached credentials entered in Site Settings. Refer to Credentials.
Select one of the following options:
- All Sites: the component can be deployed to devices belonging to any site.
- Selected Sites: select the sites this component can be deployed within. Select Add Site to open a pane on the right and then click Add or Remove to add or remove individual sites to the list.

You can also remove sites from the list by clicking Remove or the Delete icon to remove a specific site, or Remove All to remove all sites.


Select Add Variable to add a variable for this component. For more information about variables, refer to Input variables.
Select Add File to add files for this component. Only available for the categories Applications and Scripts. Click the Delete icon to remove a file.
NOTE You can have more than one file in the component but each file must not be larger than 3GB. In addition, you should not exceed a component size of 5GB total.
NOTE The contents of uploaded files are not verified by Datto RMM.
Post conditions examine the output (StdErr or StdOut) from a script and display the entered warning text if a specific text string is either found or not found in the output. Select Add Post-Condition to add post conditions for this component script. Only available for the categories Applications and Scripts. For more information, refer to Post-Conditions.
When you are finished creating the component, click Create Component.
NOTE You will only be able to create the component once you have entered a name for the component.
Viewing and managing components
Click the link for a component to view the component details. Refer to Creating a component. In addition, the following information is displayed at the top of the page:
- The Unique ID (UID) for the component
- Who created the component and when
- Who edited the component and when

You can edit a component in the following ways:
-
To update details, click the Edit button next to the component in the list. Refer to Creating a component. Click Save Component when done.
-
To delete, click the Delete button. Observe the warning dialog box that appears. Note that anything currently associated with the component (for example, jobs or monitors) will be affected. Click Remove.


